Italian Marinade

Today I have a short but SAVORY little recipe to share with you that could very well become a go-to marinade for you. Man, this stuff is good! I’ve used it on chicken in the picture but pork or beef works just as well and fish turns out to-die-for! You can even use it just for veggies if you have a mind to.

Again, this jewel of a recipe can be tweaked to include the seasonings you want. I find dried herbs work best for me but fresh basil or rosemary would be tasty also.

[recipe title=”Italian Marinade” servings=”1 cup” time=”10 minutes” difficulty=”easy”]

italian-seasoning-marinade

Ingredients

  • 3/4 cup olive oil
  • 3 tablespoons red wine vinegar
  • 1 tablespoon Italian Seasoning
  • 1 teaspoon onion powder
  • 1 teaspoon garlic powder
  • 1 teaspoon sugar
  • 1⁄2 teaspoon salt
  • 1⁄2 teaspoon black pepper

Directions

Whisk all ingredients together in a bowl until combined. Pour marinade into a sealable plastic bag, reserving 1/3 cup. Place your meat in the bag and refrigerate for at least 2 hours. Remove from bag, discard marinade and cook as desired. Use the reserved marinade to brush your meat about 10 minutes before done.

Cooking Note
Cook covered until the final 10 minutes then leave uncovered to brown.

[/recipe] Facebooktwitterpinterestlinkedin

Fried Chicken Marinara

The other evening, I wanted something that would cook up quickly but didn’t want one of those boring quick-to-table recipes. With some beautiful chicken breasts I needed to use and a craving for pasta, I set to work on coming up with something new.

Now I know it’s a bit cliche for this recipe post on my southern cooking blog to start with the words “Fried Chicken” but be real, folks…you know you love it! If it makes you feel better, call it Chicken Parmesan. Whatever you call it, you’re going to love the way the crispy chicken and marinara blend.

I’m using a good quality, jarred tomato sauce as a base for this. Now, I do like to make my sauce from scratch but there are some good sauces you can pick up at the grocery store. They make a good start and the additional ingredients really kick up the flavor.
Just find a good brand you like and make it your own. My personal favorite is the Bertolli line but try out others to match your taste.

Another one of those recipes you can tweak to match your tastes. Try it out and I think you’ll find it’s a family pleaser.

[recipe title=”Fried Chicken Marinara” servings=”4″ time=”1 hour” difficulty=”easy”]

chicken-marinara2Marinara

  • 1 lg jar pasta sauce
  • 2 cans diced tomatoes, well-drained
  • 6-8 white mushrooms, quartered
  • 1⁄2 med sweet onion, roughly chopped
  • 1⁄2 bell pepper, roughly chopped
  • 1 teaspoon garlic powder
  • 1 teaspoon onion powder
  • 2 tablespoons Italian seasoning
  • 1 tablespoon olive oil
  • Salt and pepper to taste

Fried chicken

  • 2 large boneless skinless chicken breast cubed
  • Enough milk in bowl to cover chicken

Place the following items in a 1 gallon Ziploc

  • 1 cup flour
  • 2 teaspoon each garlic and onion powder.
  • 3 tablespoons canned parmesan cheese.
  • 1 teaspoon each salt and pepper

Place chicken to soak in milk bath for at least 45 minutes.

Mix all ingredients for marinara in a medium sauce pot and bring to a low simmer. Stir often and keep covered, simmering on low for 1 hour.

Place dry ingredients for fried chicken in bag and shake to combine. Drain chicken and place in bag, shake well. Heat 1⁄2 inch olive oil for frying in 12” iron skillet. Gently remove chicken from bag and carefully place in the hot grease. Don’t crowd but most if not all will fit in one batch. Try really hard to only flip once. When both sides are golden brown, remove to paper towel to drain.

Boil 1 pound of pasta as per directions on package and drain well. Place desired amount of pasta on plate hollowing out the center. Place 5 or 6 pieces of fried chicken in center well. Dip a ladle full of marinara on top of chicken. Place a few more pieces of chicken on pasta and top with marinara. Serve right away.

[/recipe] Facebooktwitterpinterestlinkedin

Chicken Noodle Soup

Nothing tastes better on a cold winter’s night than a bowl of hot soup. It makes up quick and tastes delicious – belly-warming  Chicken Noodle Soup.

I think soup is the ultimate comfort food.  Add a chunk of homemade artisan bread and you could comfort yourself right into hibernation mode. Not to mention, with all the creeping crud going around, you can’t choose a better remedy than this.

I’ve had people request this soup to help cure a cold. I don’t profess to be a doctor but I can tell you that the herbs and spices in this soup do seem to help make you feel better. So that old wives’ tale about chicken soup for a cold may be more truth than folklore. And, heck, if it doesn’t cure it, at least you get a meal that will warm your soul.

Let’s make some soup!

[recipe title=”Chicken Noodle Soup” servings=”6″ time=”1 hour” difficulty=”easy”]

cns2Ingredients

  • 2 tablespoons olive oil
  • 1 medium sweet onion chopped
  • 3 cloves garlic finely chopped
  • 3 or 4 medium carrots chopped
  • 3 stalks celery cut long ways then chopped
  • 3 boneless, skinless chicken breast cubed
  • 1 tablespoon Italian seasoning
  • 1 bay leaf
  • 1⁄2 teaspoon salt & pepper
  • 4 (14 1⁄2-oz) cans chicken broth
  • 2 cups water
  • 1⁄2 8-oz bag egg noodles

Directions

In a medium stockpot, heat oil on medium heat. Add onions and garlic, stirring for 4 or 5 minutes. Add broth, water, carrots, celery, Italian seasoning, chicken breast, bay leaf and salt & pepper. Bring to a medium boil covered for 25-30 minutes. Add egg noodles and follow package cooking instructions while gently stirring. Cover remove from heat and allow to rest 10 minutes.

*Cooking notes*
Remove bay leaf and discard before eating.

[/recipe] Facebooktwitterpinterestlinkedin

Pineapple Upside Down Cake

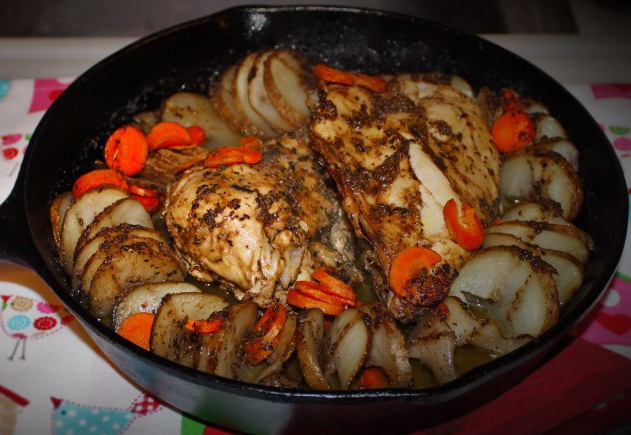
I got my love of cooking from my Grandma Blackstock.  She put a lot of good food out of her old kitchen and I think of her often when I pull out my cast iron skillet to cook up something delicious. What I learned in her kitchen is the foundation of any cooking skill I have and I respect her for her knowledge and willingness to share it with me.

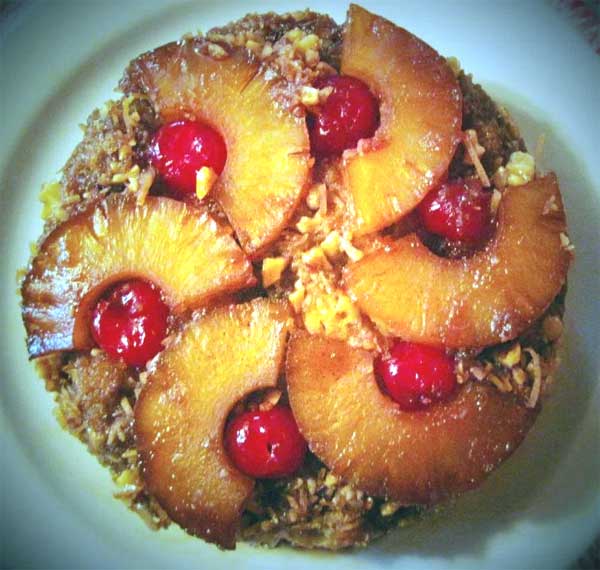
Beyond a doubt, one of the biggest treats I remember was her Pineapple Upside Down Cake. That fruity, buttery topping melted down into the spongy cake – makes my mouth water just to think of it! It seemed very exotic to me as a child with the pineapple and cherries but now I know it’s just plain good.

I use a casserole dish for this because I like the extra room to layer the cake. You can use a cake pan or an iron skillet as well. You can use a larger, shallower pan. Just add more pineapple and cherries and shorten baking time about 10 minutes.

You want to invert the cake out immediately upon taking it out of the oven or the sugar may stick to the pan and ruin the design of fruit on top.

I’ve made a few changes to Grandma Blackstock’s recipe but I think she would approve. Give it a try and see what you think.

[recipe title=”Pineapple Upside Down Cake” servings=”8″ time=”30 minutes” difficulty=”easy”]

pineapple2Ingredients

  • ½ cup butter divided
  • ½ cup packed dark brown sugar
  • 3 pineapple rings cut in half
  • 6 maraschino cherries
  • ½ cup each chopped coconut & walnuts
  • 1 ½ cups all- purpose flour
  • 1 ½ teaspoon baking powder
  • ½ teaspoon salt
  • 1 cup white sugar
  • ¾ cups whole milk
  • 1 egg
  • 1 teaspoon pure vanilla extract

Directions
Preheat oven to 325°. Lightly grease the inside of a 7” or 8” round deep sided casserole dish. In a microwave-safe bowl, melt ¼ cup butter in the microwave. Whisk in brown sugar and heat again for 25-30 seconds. Whisk again and pour into prepared pan. Arrange pineapple halves on top of sugar mixture. Put cherries between pineapple halves and sprinkle coconut and walnuts on top.

In a mixing bowl, combine white sugar, remaining butter, salt, and egg. Mix slowly, adding vanilla and milk until well combined. Add flour and baking powder, mix for one minute while scraping sides of bowl. Pour batter on top of pineapples, cherries, coconut, and nuts. Place pan in oven. Bake 60-70 minutes or until a thin blade comes out of the center clean. When cake is done, remove from oven and immediately invert onto a pie plate. Allow to sit at least 10 minutes to allow sugar mixture to be absorbed into the cake before removing pan. Cool completely before covering.

Cooking Notes
You can use a larger, shallower pan. Just add more pineapple and cherries and shorten baking time about 10 minutes.

[/recipe] Facebooktwitterpinterestlinkedin