Old Fashioned Tea Cakes

Normally I have a pretty good idea of what most of the new recipes I work on should look like and how they are supposed to taste. Well, this recipe turned out to be nowhere near normal. Shocking right?

Let me just start from the beginning. I get a simple message from a fellow baker that reads, “Do you know how to make Tea Cakes?” and me just being me, I almost reply with “I bet I can figure it out.” But before I type a single letter, my brain kicks into gear and I realize I have never even seen a tea cake before, much less tasted one!

So after I reined my ego in, I wrote, ”No, I don’t, but I can try to find somebody who does.” I really figured saying that would buy me plenty of time and I would look into it at my leisure. Fat chance, big boy! My friend replied back with a quickness, “Oh Andy, thank you so much! my neighbor lady is really old and when I was checking in on her, we got to talking about the good ole days and she asked me if I would bake her some tea cakes like her Mama used to make when she was a child. I’m really not sure where to start.”

Well, daggum it, I’m in too far to make a long story short so please indulge me and read on.

The first thing I figured I needed to do was to find a picture of one. I found 16 images of tea cakes and you guessed it – no two even remotely matched. The same thing happened when I read recipes – some sounded like cookies, others would have turned out to be cakes. To be quite honest, I did not have a clue what to do next. I was about ready to throw in the towel and move on but I just didn’t feel right about doing that to that sweet old lady.

So I decided to talk to the one person I knew that could help me if anyone could, my mother-in-law (Granny) and it was like hitting the tea cake lottery. She said “Oh yes, I remember making those right after the depression!” Well, that’s all it took for me. I was on the edge of my seat, pencil in hand. She continued, ”We didn’t have much money back then and those little tea cakes were such a treat.”

Using her thumb and forefinger as a measuring tool, she said, “They need to be rolled this thick and I always use a round can to cut them with.” She went on to tell me, ”They need to be slightly crunchy on the outside but tender and cake-like in the middle and not to sweet.”

I baked her a batch and she said they were perfect. I shared this recipe with my baking friend, she made some for her neighbor lady and that sweet lady said they were just like she remembered them. Yeah, I would say this is a keeper.

Granny took a long while telling me all about tea cakes and I will never be able to thank her enough so I will share the recipe with you and hope you share this with someone you love.

[recipe title=”Old Fashioned Tea Cakes” servings=”4 dozen” time=”13 hours (12 for chilling)” difficulty=”Medium”]
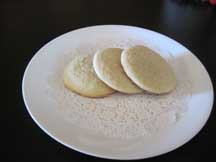
old-fashioned-southerntea-cIngredients

  • 1 cups butter room temperature
  • 2 ½ cups sugar plus extra for sprinkling
  • 3 eggs
  • 5 cups all- purpose flour
  • 1 teaspoon baking soda
  • 1 tablespoon buttermilk
  • 2 teaspoons pure vanilla extract

Directions

Whisk together flour and baking soda in a bowl and set aside. Cream together butter and sugar. Add eggs one at a time, mixing after each addition. Scrape bowl down. Add buttermilk and vanilla and mix on slow until fully incorporated. Continue mixing and slowly add flour mixture scraping down bowl as needed just until no flour is visible in dough. Transfer dough into plastic wrap, making sure to completely cover and chill for several hours or overnight.

Preheat oven to 400°. Unwrap dough, cut into 2 equal pieces, rewrap one and place back in refrigerator. Place remaining piece on a well- floured piece of waxed paper. Dust the top of dough with flour and roll to a thickness of ¼” with a floured rolling pin. Sprinkle top lightly with sugar, using a medium to large biscuit cutter, cut out teacakes and place on a well-greased cookie sheet. Bake 7 to 9 minutes. Remove from oven and allow to cool completely on cookie sheet. Repeat with second piece of dough.

Cooking notes

The dough is extremely sticky and cannot be worked until completely chilled. Any surface that comes in contact with dough will stick.  Almost any fruit or nut extract works well in the place of vanilla.

[/recipe] Facebooktwitterpinterestlinkedin

Spicy Shrimp and Chicken Gumbo

When I got out of the navy in ‘82, jobs were scarce in Atlanta but I was fortunate enough to find one off Ashby Street in the West End. After about 6 months, I was given the opportunity to transfer to the big city of Houston, TX – a 25% pay raise and the company would pay all moving expenses. At 22 years old, I was like “Heck yeah, I’m all in!”

Talk about culinary culture shock – their BBQ was beef not pork, I swear they had more sausages than days in the week and what was this cumin stuff? And the Tex-Mex and Mexican choices were endless and delicious! But that’s a post for another day.

Well, the folks I was working with were old school French Cajuns from Baton Rouge and, to put it simply, they knew how to burn in the kitchen! I was introduced to boudin sausage, crawfish, gator tail, frog legs and probably 100 more bayou delicacies. The one meal that always stuck out in my mind above all the rest was the Gumbo and since then, I have eaten it with everything from mudbugs to gator tails in it. I can say without a doubt the worst I ever had was excellent. On a bed of rice, good gumbo is nothing short of heavenly

Before we get down to making this dish, let’s talk about the number one most important step to making a rich, delicious gumbo – the roux. Pronounced “roo”, it is basically a combination of equal parts (by weight) of flour and fat. Cooked together to form a paste, it thickens your dish without lumps and, properly prepared, adds a complex flavor and color. Now, some people will try just adding the flour to the pot but even if you avoid the lumps (almost impossible), you end up with a less flavorful outcome with a floury undertone.

Roux comes in three versions – white, which is used for sauces such as béchamel (think mac and cheese; blonde, great for gravies; and brown, which is what we use for this yummy gumbo. The finished roux is caramelized to a deep brown color with a nutty flavor and aroma. Now, that’s some good stuff there!

I use a cast iron skillet and a wooden spoon to make my roux, but do not use cast iron to cook this dish as it will darken your tomato-based dish to an unattractive color. If you don’t have a cast iron skillet (gasp!!), any heavy pan made from a non-reactive material will work. Note: an aluminum pan and a wire whisk will make your roux gray. Heat your fat (butter, oil, lard, olive oil – whatever your preference), add the flour, stirring to make a paste and cook over medium heat until a deep, rich brown and the consistency of wet cement, about 30-35 minutes. This isn’t something you can walk away from very far – burnt roux will ruin your gumbo.

Enjoy this recipe. Feel free to change up the meat and seafood options to your taste. [recipe title=”Spicy Chicken and Shrimp Gumbo” servings=”10-12″ time=”3 hours” difficulty=”medium”]

Gumbo-1Ingredients

  • ½ cup olive oil, divided
  • 2 tablespoons all-purpose flour
  • 1 large sweet onion roughly chopped
  • 1 bell pepper roughly chopped
  • 1 stalk celery finely chopped
  • 2 boneless, skinless chicken breast cut into 1” pieces
  • 1 tablespoon chopped garlic
  • 2 bay leaves
  • 2 cans (14oz size) chopped tomatoes with juice
  • 1 can (14oz size) whole kernel corn
  • 6 cups chicken broth
  • 4 teaspoons Creole seasoning
  • 1 or 2 (how hot do you want it) teaspoons cayenne or chipotle pepper
  • 2 teaspoons table salt
  • 1 teaspoon black pepper
  • 1 lb large shrimp peeled and deveined
  • 2 ½ cups okra sliced into ¼” pieces

Directions

Add 1/4 c. olive oil to a heavy, non-reactive skillet, over medium heat. Sprinkle flour over oil, stirring constantly to combine. Continue to heat and stir until roux is a rich, dark color, about 30 minutes. Set aside to cool.

In a large stock pot (not cast iron), heat 1/4 c. oil to medium and saute onion, bell pepper and celery until onion is opaque. Add chicken and cook until tender. Add garlic and cook 1 minute. Stir in roux to combine. Slowly add water while stirring and bring to a slight boil. Stir in remaining ingredients *EXCEPT OKRA AND SHRIMP* and simmer on medium while covered for at least 45 minutes, stirring occasionally. Add shrimp and okra, cover and allow to cook for 15 more minutes. Remove bay leaves and serve on a bed of your favorite rice.

Cooking Notes

  • Do not cook this in a cast iron pot. It will change the color of your finished gumbo.
  • I use Tony Chachere’s creole seasoning and am always pleased with the results. It can be purchased almost anywhere and it won’t break the bank.
  • Okra cooks fast so I put it in last. I like when the seeds still pop in your mouth. Also, if overcooked, okra will make your gumbo very thick.
[/recipe] Facebooktwitterpinterestlinkedin

Welcome Home

corn-bread
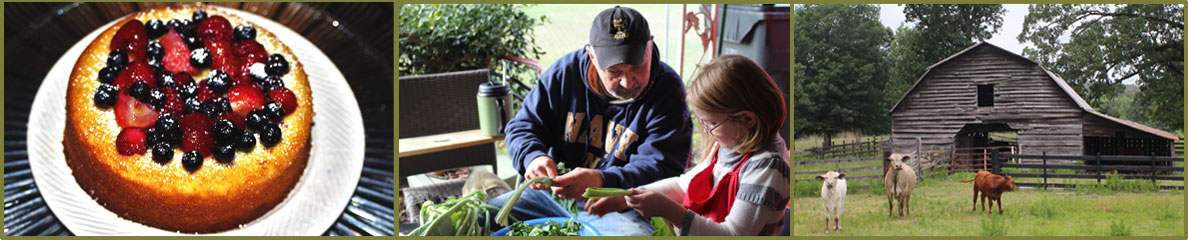
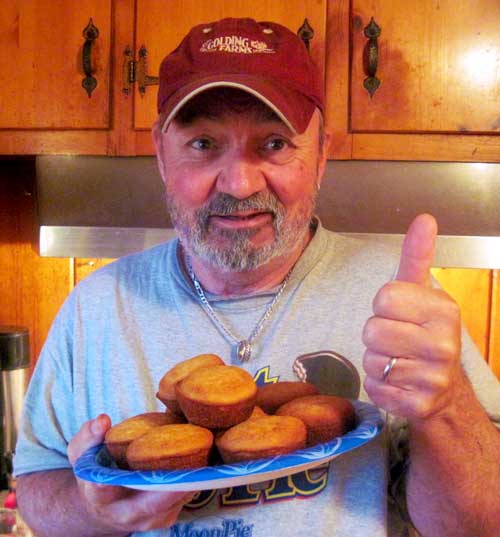
There is nothing I love better than small-town life and the sense of community that goes along with it. Going to the grocery store and ALWAYS seeing someone you know, the way people love to exchange stories and recipes and jump to help their neighbors – now that’s the good stuff!

I sure am glad you’re here in our community. After all, what is a blog but a small town of sorts? No matter where you live, in a big city high rise or a ranch in Wyoming, you are tasting the life that is community – people, stories, food, and conversation. Come on in the house, then!

Facebooktwitterpinterestlinkedin

Creamy Mushroom Soup

Comfort food – whether it’s the grilled cheese and tomato soup your Mama fixed you when you were under the weather or your Granny’s chicken and dumplings, it makes us feel better or takes us back to a time in our childhood. We all have that one, usually-not-so-healthy meal that just makes us feel “Ahhhh”.

My wife calls this recipe comfort food. When she is stressed or doesn’t feel well, she wants my Mushroom Soup. The last week was a little hard on her so I surprised her on Friday with her feel-better meal. Scored some major points there!

I just use plain old white mushrooms. You could get fancy and use wild mushrooms but I honestly don’t think you could improve much on the basic recipe. Mushrooms are usually sold in 8 oz. packs so use 3 packs.

For this recipe, a cast iron Dutch oven works best because even heat distribution is very critical. If you don’t have one, use a heavy soup pot – this is not a recipe for your pretty aluminum cookware. Monitor heat closely at all times and do not allow the soup to reach a hard boil. When you boil cream-based dishes, the milk proteins will separate from the water – that’s called curdling. It will ruin the smoothness that makes this soup so good.

You will get a workout with this recipe! Any time cream and flour are used together in a recipe you must whisk continuously to avoid scorching and to blend smoothly so don’t put this soup on and go watch the end of American Idol. Stay close by and pay attention.

[recipe title=”Creamy Mushroom Soup” servings=”6-7″ time=”1 hour” difficulty=”easy”]

mushroom-soup2Ingredients

  • 1 1⁄2 pounds fresh white mushrooms
    chopped
  • 1 medium sweet onion finely chopped
  • 1 teaspoon Italian seasoning
  • 6 Tablespoons butter
  • 4 cups chicken stock or broth
  • 1⁄4 cup plus 1 Tablespoon all-purpose flour
  • 1 1⁄4 cup Half & Half
  • 1 teaspoon table salt
  • 1⁄2 to 1 teaspoon black pepper

Directions
In a Dutch oven combine chicken broth, mushrooms, Italian seasoning, salt and pepper. Bring to a low simmer and cover, stirring occasionally. In a medium saucepan, melt butter and add onions. Cook until onions are very tender. Slowly add flour while whisking continuously. When flour is completely combined, add half & half and continue to whisk. When fully incorporated, pour into simmering mushroom mixture. Reduce heat slightly and allow to cook for 15 to 20 minutes, stirring often. Remove from heat, cover and allow to rest for 5 to 10 minutes before serving.

Cooking notes

  1. A cast iron Dutch oven works best for this recipe because even heat distribution is very critical.
  2. Monitor heat closely at all times. Do not allow to reach a hard boil.
[/recipe] Facebooktwitterpinterestlinkedin