Homemade Strawberry Ice Cream

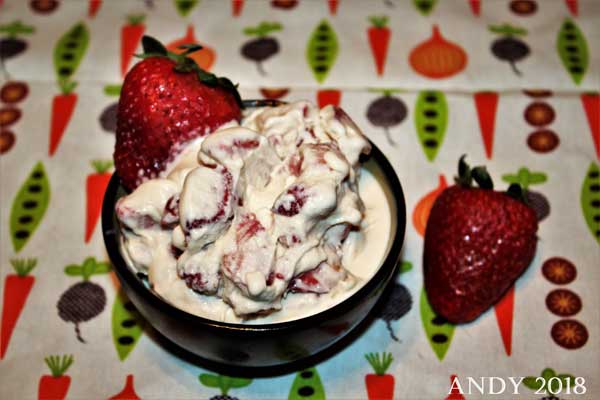
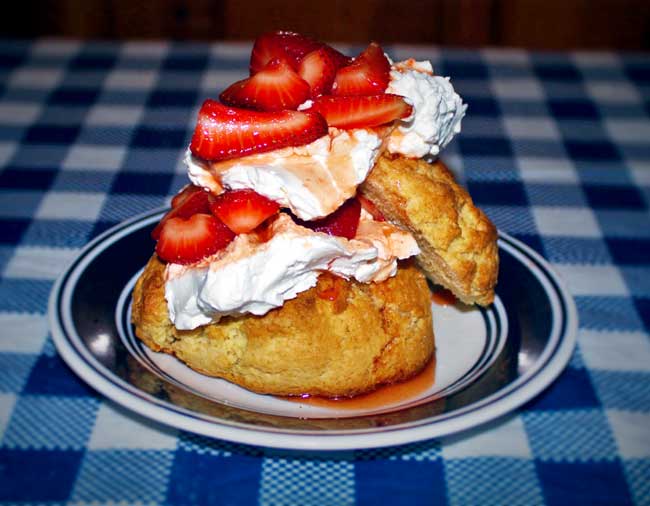
I still have plenty of strawberries left after my Traditional Strawberry Shortcake earlier this week. Since we’ve had some pretty hot weather here in Georgia, it seemed like the time to make some strawberry ice cream. I can hear your mouth watering!

When I was a kid, every summertime gathering was topped off with hand-churned, creamy, sweet homemade ice cream. It was a big production – the egg-rich custard put together the night before, snug in its canister in the fridge, a big white bowl full of sliced strawberries sparkling with sugar and piles of ice in old aluminum coolers.

ic4

The old wooden ice cream freezer had seen a gazillion bowls of frozen goodness made. All the men would gather around to argue about how much ice and salt to use, making sure it was set up in a place where it wouldn’t kill the grass. Most everybody’s yard had a bald spot somewhere that became the ice cream making place.

Once the ratio of salt to ice was agreed to, one of the ladies would bring out the frosted canister with the strawberries added. It would be carefully placed in the bucket and fastened down. The ice and salt went in around it, packed in good and a folded up burlap bag folded on top.

That’s when the kids went to work. The little kids took turns sitting on the scratchy burlap to hold down the bucket good. The big kids (or big kid wannabes) would take turns cranking the handle around and around. As the ice cream started to freeze, it became harder to crank and the strongest kids would show off, struggling to turn the handle.

It seemed then that it took forever but the longest wait was to come. When it was just too hard to crank, it would be packed all around with more burlap and then we had to let it “ripen”. Knowing you were just minutes away from strawberry ice cream heaven made minutes pass very slowly.

Finally, the canister was removed, wiped to remove the salt and the top removed. Someone would take a spoon and remove about an eighth of an inch of the ice cream (in case a grain of salt found its way in), then dip in a spoon and taste it like it was fine wine. All us kids, mouths watering, waited to hear the taster’s verdict. Once it was declared “the best we’ve ever made”, we would line up with our bowls. Everybody got a heaping ladle full and we would get brain freezes, trying to eat it up before it melted, then slurping up the melted, sweet custard in the bottom of the bowl.

This recipe is a little different from what we had back in the day because that old recipe had a full dozen raw eggs. Of course, we know that eating raw eggs is not very safe, although amazingly, we survived it. This updated recipe uses a cooked custard, still very rich with eggy, creamy goodness. Definitely not a low-fat dessert but if you’re going to go to that much trouble, you shouldn’t care!

This is one of those recipes where I say “be careful” a lot. First of all, be careful not to let your milk and cream get beyond a simmer. It will change the taste and texture of your ice cream. Just a bare movement of the surface of the custard will do it.

ic3

The key to this recipe is properly tempering the eggs. You want to bring the heat up slowly to avoid scrambling them. Be patient, believe me, it’s worth it. That gentle warm-up is going to heat the eggs through so they incorporate properly.

Pour into the canister and put it in the fridge at least long enough to put a good chill on it Make sure you pour the berries AND the juice into the custard so you don’t lose any flavor.

ic2

Once its ice cold, put it into your freezer and process. Most freezers today are electric and don’t need much effort to end up with ice cream. If you’re lucky enough to have an old hand crank freezer and a passel of kids hanging out, do it the old-fashioned way. Just be careful not to get a brain freeze.

[recipe title=”Homemade Strawberry Ice Cream” servings=”8-10″ time=”90 minutes” difficulty=”easy”]

icsmIngredients

  • 4 cups strawberries, stems removed, sliced
  • 1 tablespoon freshly squeezed lemon juice
  • ¾ cup white sugar divided
  • 1/2 cup brown sugar (firmly packed)
  • 5 large egg yolks
  • 1/2 teaspoon kosher salt
  • 2 cups heavy cream
  • 1 1/2 cups milk
  • 1 teaspoon Pure vanilla extract

Directions

Combine the strawberries with the lemon juice and 1/4 cup of the sugar in a bowl. Toss until the ingredients are well incorporated and allow to macerate in the refrigerator for several hours to let the natural juice of the strawberry come out.

In a large bowl, whisk together egg yolks. Add granulated and brown sugars as well as salt and whisk together until lightened in color and smooth.

Pour the half and half, the heavy cream, and the vanilla bean into a medium saucepan, over medium heat. Bring the mixture just to a simmer, stirring occasionally

Use a ladle to transfer one spoonful at a time of the hot cream to the egg yolk mixture while whisking the entire time. Your goal is to slowly mix in the hot mixture to temper the eggs but not to cook them. Continue to slowly add the hot cream while whisking until all of it has been thoroughly combined.

Return the entire mixture to the saucepan and place over medium-low heat. Continue to cook, stirring frequently, until the mixture thickens slightly and coats the back of a spoon. For me, this is more of a gut feel thing to know when it was ready, but you can definitely tell when the mixture has thickened. Do not let it get to the point where the eggs begin to cook. You should be able to touch the mixture with your finger without burning yourself

Pour the mixture into a bowl and allow to sit at room temperature for 30 minutes.

Cover the bowl and refrigerate for at least four hours.

Alternatively, you can pour the mixture into a bowl and set over another large bowl filled with ice water. Stir to cool the mixture down. You want the custard to be ice cold before churning.

Stir the chilled strawberry mixture into the custard.

Pour into an ice cream maker and process according to the manufacturer’s directions.

This batch took 40 minutes.
[/recipe] Facebooktwitterpinterestlinkedin

Traditional Strawberry Shortcake


Springtime – sunshine, picnics, road trips and great fresh fruits and vegetables! And absolutely nothing screams springtime better than big, juicy, sweet strawberries. This time of year, every roadside stand, farmers’ market and grocery store has strawberries for great prices. I got some last week for .98/lb.

Now, if you’re a strawberry lover like I am, this is a great time to buy mass quantities of these little tasty gems and freeze them or make jams or preserves. That way, you can have a little bit of springtime all year long. But make sure you save enough of them to make strawberry shortcake. Of course, you could buy those little spongy cakes in the grocery store but believe me, it’s worth your time and effort to make it all from scratch. Your family and guests will rave about it.

The first step in creating this delicious dessert is choosing perfect berries.  Ideally, you should buy locally, organically produced fruit to avoid pesticide contamination. If yours aren’t organically grown, make sure you wash them good. Look for bright red berries with no white or green around the stems and no bruising or mold. Shape and size do not matter much but the fragrance does. You want that fresh, sweet strawberry aroma with no hint of mold or fermentation.

Slice your strawberries so they are bite size. You want people to be able to get strawberry, cake and whipped cream in each bite, not having to chew around a huge berry. Sugar them first and set aside before starting the shortcakes so they can soak up the extra sweetness.

Of course, allow your cakes to cool completely before assembling your shortcakes so your whipped cream doesn’t melt. It’s ok to make them a little bit ahead but the sooner they are eaten after assembly, the better they are.

On this recipe, you can get creative. Your daughter is allergic to strawberries? Use peaches or blueberries. Or crumble the cakes and layer in a Mason jar to make them portable. You’re only limited by your creativity.

[recipe title=”Strawberry Shortcake” servings=”6-8″ time=”10 minutes” difficulty=”easy”]


ss2.jpgIngredients

  • 1lb sliced strawberries
  • 1⁄2 cup white sugar
  • 3 cups sifted all-purpose flour
  • 4 teaspoons double action baking powder
  • 2 teaspoon baking soda
  • 3⁄4 cup white sugar
  • 1 1⁄2 teaspoon table salt
  • 1 1⁄2 sticks of cold butter cut in small pieces
  • 1 cup buttermilk
  • 1 tablespoon fresh lemon juice
  • 1⁄2 teaspoon pure vanilla extract
  • 2 cups heavy whipping cream
  • 1⁄4 cup white sugar

Strawberry Topping – In a mixing bowl combine strawberries and sugar, cover with a cloth and set aside at least 20 minutes or until strawberries become very juicy.

Shortcakes – Preheat oven to 400°. In a large mixing bowl whisk together flour, baking powder, baking soda, sugar, and salt. Using a pastry blender, cut the butter into flour mixture until it resembles coarse crumbs. Make a well in the center of mixture and add buttermilk. Using a large spoon, stir wet and dry ingredients together just until mixed. Line a baking pan with parchment paper and spoon 1/3 of a cup of shortcake dough on baking sheet leaving 1 1⁄2 inches between each one. Bake 15-17 minutes or until medium brown. Remove and place pan on cooling rack.

Whipped Cream – Put mixer bowl and mixer whisk attachment in the freezer for 10 minutes, then remove and place back on mixer. Add sugar and heavy whipping cream and mix on high until stiff peaks form.
[/recipe] Facebooktwitterpinterestlinkedin

Pineapple Upside Down Cake

I got my love of cooking from my Grandma Blackstock.  She put a lot of good food out of her old kitchen and I think of her often when I pull out my cast iron skillet to cook up something delicious. What I learned in her kitchen is the foundation of any cooking skill I have and I respect her for her knowledge and willingness to share it with me.

Beyond a doubt, one of the biggest treats I remember was her Pineapple Upside Down Cake. That fruity, buttery topping melted down into the spongy cake – makes my mouth water just to think of it! It seemed very exotic to me as a child with the pineapple and cherries but now I know it’s just plain good.

I use a casserole dish for this because I like the extra room to layer the cake. You can use a cake pan or an iron skillet as well. You can use a larger, shallower pan. Just add more pineapple and cherries and shorten baking time about 10 minutes.

You want to invert the cake out immediately upon taking it out of the oven or the sugar may stick to the pan and ruin the design of fruit on top.

I’ve made a few changes to Grandma Blackstock’s recipe but I think she would approve. Give it a try and see what you think.

[recipe title=”Pineapple Upside Down Cake” servings=”8″ time=”30 minutes” difficulty=”easy”]

pineapple2Ingredients

  • ½ cup butter divided
  • ½ cup packed dark brown sugar
  • 3 pineapple rings cut in half
  • 6 maraschino cherries
  • ½ cup each chopped coconut & walnuts
  • 1 ½ cups all- purpose flour
  • 1 ½ teaspoon baking powder
  • ½ teaspoon salt
  • 1 cup white sugar
  • ¾ cups whole milk
  • 1 egg
  • 1 teaspoon pure vanilla extract

Directions
Preheat oven to 325°. Lightly grease the inside of a 7” or 8” round deep sided casserole dish. In a microwave-safe bowl, melt ¼ cup butter in the microwave. Whisk in brown sugar and heat again for 25-30 seconds. Whisk again and pour into prepared pan. Arrange pineapple halves on top of sugar mixture. Put cherries between pineapple halves and sprinkle coconut and walnuts on top.

In a mixing bowl, combine white sugar, remaining butter, salt, and egg. Mix slowly, adding vanilla and milk until well combined. Add flour and baking powder, mix for one minute while scraping sides of bowl. Pour batter on top of pineapples, cherries, coconut, and nuts. Place pan in oven. Bake 60-70 minutes or until a thin blade comes out of the center clean. When cake is done, remove from oven and immediately invert onto a pie plate. Allow to sit at least 10 minutes to allow sugar mixture to be absorbed into the cake before removing pan. Cool completely before covering.

Cooking Notes
You can use a larger, shallower pan. Just add more pineapple and cherries and shorten baking time about 10 minutes.

[/recipe] Facebooktwitterpinterestlinkedin

Delightfully Chocolate Muffins

The other night, I had a craving for something a little sweet. Believe it or not, sometimes even in Andy’s kitchen, there is nothing baked. I went into the kitchen and searched through the cabinets to see what might be available. After finding this and that, I came up with this little recipe.

These are not cupcakes – there is no frosting and the texture is muffin-like, not so much cake-like. But with a little sprinkle of confectioner’s sugar, they fit the bill. Sweet but not too sweet and wonderfully moist.

I love cooking with buttermilk. Baked goods end up so much moister and there’s a boost to the flavor that I don’t get with whole milk. I use what I call “full fat” buttermilk. Much of what you find in the stores is lowfat. You have to really search out the whole milk variety and sometimes it costs extra but oh, is it worth it. If you don’t believe me, try this recipe both ways. You will see what a difference that extra fat makes.

Makes a great after school treat or a simple dessert after dinner. You could even have chocolate muffins for breakfast – I won’t tell your mama! Just clean up the crumbs.

[recipe title=”Delightfully Chocolate Muffins” servings=”12″ time=”30 minutes” difficulty=”easy”]

choc-muffin2

Ingredients

  • 1⁄2 cup butter room temperature
  • 2 tablespoons water
  • 3⁄4 cup packed dark brown sugar
  • 1⁄4 cup white sugar
  • 1 cup buttermilk
  • 1 egg
  • 2 teaspoons pure vanilla extract
  • 2 cups all-purpose flour
  • 1 teaspoon baking soda
  • 1⁄2 cup Hershey’s special dark cocoa
  • 1⁄4 teaspoon table salt
  • 3⁄4 cup chocolate chips
  • 3⁄4 cup chopped walnuts

Directions
In a medium bowl combine flour, baking powder, cocoa, and salt. Whisk together well and set aside. In a second large mixing bowl, combine butter, water, both sugars, buttermilk, egg, and vanilla. Using a large spoon,  mix all wet ingredients well. Slowly pour dry mixture into wet mixture and mix just until incorporated. Add chocolate chips and walnuts and mix lightly.

Place foil-lined paper baking cups in a 12-hole regular size muffin pan. Divide batter
evenly between muffin cups. Place pan in a 375° preheated oven and bake 18 to 20 minutes or until a toothpick inserted in the center of a muffin comes out clean. Remove from oven and allow to rest 10 minutes before removing from pan.
*Baking notes*
I used 2 spoons to transfer batter from bowl to baking cup.

[/recipe] Facebooktwitterpinterestlinkedin